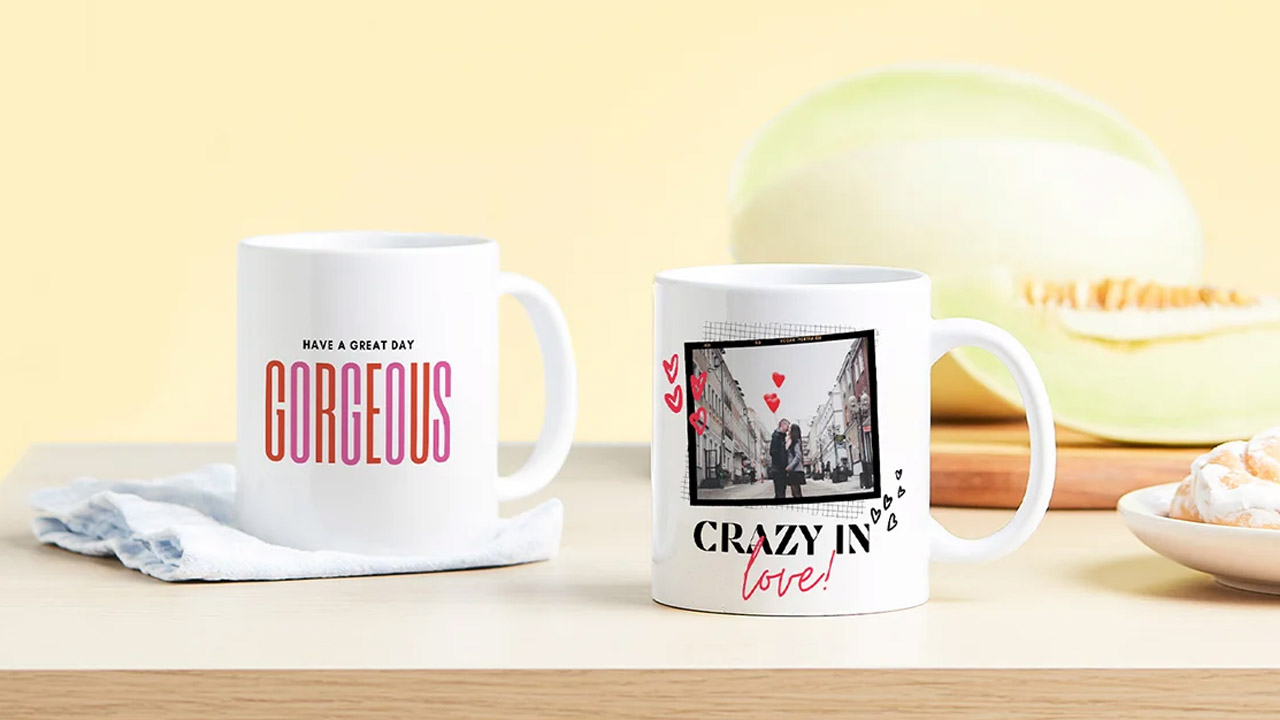
Unleash Your Creativity with Sublimation Mugs The Ultimate Guide to Custom Designs

Abstract: Sublimation mugs are the perfect canvas for showcasing your creativity and personal style. In this ultimate guide, we will take you through the process of creating custom designs on sublimation mugs, allowing you to unleash your creativity and produce unique and eye-catching pieces. From design inspiration to the sublimation process, we'll provide you with valuable tips and techniques to create stunning personalized mugs that will leave a lasting impression.  Keywords: sublimation mugs, custom designs, creativity, personalized mugs, design inspiration, sublimation process.  Unleash Your Creativity with Sublimation Mugs – The Ultimate Guide to Custom Designs  Are you ready to transform ordinary mugs into extraordinary works of art? Look no further than sublimation mugs! Sublimation allows you to transfer your custom designs onto ceramic mugs, creating personalized pieces that are truly one-of-a-kind. In this ultimate guide, we will walk you through the process of creating stunning custom designs on sublimation mugs, empowering you to unleash your creativity and produce mugs that reflect your unique style.  Step 1: Gather Inspiration Before diving into the design process, gather inspiration from various sources such as online platforms, magazines, or your own imagination. Explore different themes, patterns, colors, and typography to get your creative juices flowing. Take note of elements that resonate with you and consider how they can be incorporated into your custom designs.  Step 2: Design Creation Using graphic design software or online design tools, bring your ideas to life. Experiment with different layouts, fonts, and graphics to create a visually appealing design. Consider the mug's shape and size, and ensure that your design is compatible with the printable area. Play with color combinations and textures to add depth and visual interest to your artwork.  Step 3: Printing Preparation Once your design is finalized, it's time to print it on sublimation paper. Ensure that you use sublimation ink and a compatible printer for optimal results. Adjust the print settings to achieve high-resolution and vibrant colors. Remember to mirror or flip your design horizontally before printing, as it will be transferred onto the mug in reverse.  Step 4: Mug Preparation Prepare the sublimation mugs for the printing process. Make sure they are clean and free from any dust or residue. It's recommended to use ceramic mugs with a special sublimation coating for the best results. Position the mug in a heat-resistant jig or mug press to hold it securely in place during the transfer.  Step 5: Sublimation Process Place the printed sublimation paper with the design facing the mug's surface. Use heat-resistant tape to secure the paper in place, ensuring it doesn't shift during the process. Preheat the mug press to the recommended temperature and time settings. Once ready, carefully position the mug in the press, close it, and let the heat and pressure work their magic.  Step 6: Reveal and Enjoy Once the transfer time is complete, open the mug press and remove the mug, taking caution as it will be hot. Peel off the sublimation paper to reveal your custom design now permanently infused into the mug's coating. Allow the mug to cool down completely before handling or packaging it. Admire your creation and get ready to enjoy a beverage in your personalized masterpiece!  Tips for Creating Stunning Custom Designs:  Experiment with different design elements, including colors, textures, and patterns. Incorporate personal photos, quotes, or meaningful symbols to add a personal touch. Consider the recipient's preferences and interests when designing for a gift. Use high-resolution images or vector graphics for

Abstract:
Sublimation mugs are the perfect canvas for showcasing your creativity and personal style. In this ultimate guide, we will take you through the process of creating custom designs on sublimation mugs, allowing you to unleash your creativity and produce unique and eye-catching pieces. From design inspiration to the sublimation process, we'll provide you with valuable tips and techniques to create stunning personalized mugs that will leave a lasting impression.

Keywords: sublimation mugs, custom designs, creativity, personalized mugs, design inspiration, sublimation process.

Unleash Your Creativity with Sublimation Mugs – The Ultimate Guide to Custom Designs

Are you ready to transform ordinary mugs into extraordinary works of art? Look no further than sublimation mugs! Sublimation allows you to transfer your custom designs onto ceramic mugs, creating personalized pieces that are truly one-of-a-kind. In this ultimate guide, we will walk you through the process of creating stunning custom designs on sublimation mugs, empowering you to unleash your creativity and produce mugs that reflect your unique style.

Step 1: Gather Inspiration
Before diving into the design process, gather inspiration from various sources such as online platforms, magazines, or your own imagination. Explore different themes, patterns, colors, and typography to get your creative juices flowing. Take note of elements that resonate with you and consider how they can be incorporated into your custom designs.

Step 2: Design Creation
Using graphic design software or online design tools, bring your ideas to life. Experiment with different layouts, fonts, and graphics to create a visually appealing design. Consider the mug's shape and size, and ensure that your design is compatible with the printable area. Play with color combinations and textures to add depth and visual interest to your artwork.

Step 3: Printing Preparation
Once your design is finalized, it's time to print it on sublimation paper. Ensure that you use sublimation ink and a compatible printer for optimal results. Adjust the print settings to achieve high-resolution and vibrant colors. Remember to mirror or flip your design horizontally before printing, as it will be transferred onto the mug in reverse.

Step 4: Mug Preparation
Prepare the sublimation mugs for the printing process. Make sure they are clean and free from any dust or residue. It's recommended to use ceramic mugs with a special sublimation coating for the best results. Position the mug in a heat-resistant jig or mug press to hold it securely in place during the transfer.

Step 5: Sublimation Process
Place the printed sublimation paper with the design facing the mug's surface. Use heat-resistant tape to secure the paper in place, ensuring it doesn't shift during the process. Preheat the mug press to the recommended temperature and time settings. Once ready, carefully position the mug in the press, close it, and let the heat and pressure work their magic.

Step 6: Reveal and Enjoy
Once the transfer time is complete, open the mug press and remove the mug, taking caution as it will be hot. Peel off the sublimation paper to reveal your custom design now permanently infused into the mug's coating. Allow the mug to cool down completely before handling or packaging it. Admire your creation and get ready to enjoy a beverage in your personalized masterpiece!

Tips for Creating Stunning Custom Designs:

Experiment with different design elements, including colors, textures, and patterns.
Incorporate personal photos, quotes, or meaningful symbols to add a personal touch.
Consider the recipient's preferences and interests when designing for a gift.
Use high-resolution images or vector graphics for

Abstract: Sublimation mugs are the perfect canvas for showcasing your creativity and personal style. In this ultimate guide, we will take you through the process of creating custom designs on sublimation mugs, allowing you to unleash your creativity and produce unique and eye-catching pieces. From design inspiration to the sublimation process, we'll provide you with valuable tips and techniques to create stunning personalized mugs that will leave a lasting impression.  Keywords: sublimation mugs, custom designs, creativity, personalized mugs, design inspiration, sublimation process.  Unleash Your Creativity with Sublimation Mugs – The Ultimate Guide to Custom Designs  Are you ready to transform ordinary mugs into extraordinary works of art? Look no further than sublimation mugs! Sublimation allows you to transfer your custom designs onto ceramic mugs, creating personalized pieces that are truly one-of-a-kind. In this ultimate guide, we will walk you through the process of creating stunning custom designs on sublimation mugs, empowering you to unleash your creativity and produce mugs that reflect your unique style.  Step 1: Gather Inspiration Before diving into the design process, gather inspiration from various sources such as online platforms, magazines, or your own imagination. Explore different themes, patterns, colors, and typography to get your creative juices flowing. Take note of elements that resonate with you and consider how they can be incorporated into your custom designs.  Step 2: Design Creation Using graphic design software or online design tools, bring your ideas to life. Experiment with different layouts, fonts, and graphics to create a visually appealing design. Consider the mug's shape and size, and ensure that your design is compatible with the printable area. Play with color combinations and textures to add depth and visual interest to your artwork.  Step 3: Printing Preparation Once your design is finalized, it's time to print it on sublimation paper. Ensure that you use sublimation ink and a compatible printer for optimal results. Adjust the print settings to achieve high-resolution and vibrant colors. Remember to mirror or flip your design horizontally before printing, as it will be transferred onto the mug in reverse.  Step 4: Mug Preparation Prepare the sublimation mugs for the printing process. Make sure they are clean and free from any dust or residue. It's recommended to use ceramic mugs with a special sublimation coating for the best results. Position the mug in a heat-resistant jig or mug press to hold it securely in place during the transfer.  Step 5: Sublimation Process Place the printed sublimation paper with the design facing the mug's surface. Use heat-resistant tape to secure the paper in place, ensuring it doesn't shift during the process. Preheat the mug press to the recommended temperature and time settings. Once ready, carefully position the mug in the press, close it, and let the heat and pressure work their magic.  Step 6: Reveal and Enjoy Once the transfer time is complete, open the mug press and remove the mug, taking caution as it will be hot. Peel off the sublimation paper to reveal your custom design now permanently infused into the mug's coating. Allow the mug to cool down completely before handling or packaging it. Admire your creation and get ready to enjoy a beverage in your personalized masterpiece!  Tips for Creating Stunning Custom Designs:  Experiment with different design elements, including colors, textures, and patterns. Incorporate personal photos, quotes, or meaningful symbols to add a personal touch. Consider the recipient's preferences and interests when designing for a gift. Use high-resolution images or vector graphics for


Post time: Jun-26-2023
WhatsApp Online Chat !